Enhance a healthcare presentation with multimedia elements (images, audio, video) that support learning without creating visual clutter (CO-5)
Apply slide transitions and entrance animations purposefully, selecting effects that maintain professionalism and audience focus (CO-5)
Create a SmartArt graphic to visualize a healthcare process or organizational structure that would be difficult to convey with text alone (CO-5)
Analyze a presentation that overuses animations and multimedia, identifying which elements support and which distract from the healthcare message (CO-5)
Part 1 of 6
Part 1 of 6 — Advanced Image Editing in PowerPoint
In Lesson 3-1, you learned how to insert and position images on slides. Now you will explore PowerPoint’s built-in photo editing tools that let you refine images without leaving the application. These tools are especially valuable in healthcare presentations where visual clarity is critical — a poorly lit photograph of a medical device or a distractingly colored background image can undermine an otherwise excellent training slide.
Corrections: Brightness, Contrast, and Sharpness
Select an image and navigate to the Picture Format tab > Corrections. PowerPoint displays a grid of thumbnail previews showing various brightness and contrast combinations. Hover over each to preview the effect live on your slide, then select to apply. You can also select Picture Corrections Options at the bottom of the menu for fine-grained slider controls. In healthcare presentations, you might need to brighten a photo taken in a dimly lit clinical environment or increase contrast on a screenshot of an EHR interface to make text more legible.
Color Adjustments and Recoloring
The Color option in the Picture Format tab offers three categories of adjustments:
Color Saturation – Increase or decrease the intensity of colors in the image. Reducing saturation can create a muted, professional tone; increasing it makes colors more vivid.
Color Tone – Shift the overall warmth (orange tint) or coolness (blue tint) of the image. Adjusting tone can help match an image to your presentation’s color palette.
Recolor – Apply a monochromatic color overlay to the entire image. This is useful for creating a consistent visual style — for example, recoloring several images in your organization’s brand blue to create a cohesive look across a set of training slides.
The Crop tool removes unwanted portions of an image. Select the image, select Crop on the Picture Format tab, and drag the black handles inward to frame only the area you want to keep. For creative effects, use Crop to Shape to cut the image into a circle, oval, rounded rectangle, or other shape. In a healthcare staff directory slide, cropping headshot photos into circles creates a clean, modern look.
PowerPoint’s Remove Background tool (Picture Format tab) automatically detects the subject of a photograph and removes the background, leaving a transparent area. While not as precise as professional photo editing software, it works well for simple images. In healthcare contexts, you might use this to remove the background from a product image of a medical device so you can place it on a colored slide background without a distracting rectangular photo border.
Large, high-resolution images can inflate your file size, making the presentation slow to open and difficult to email. Use Picture Format > Compress Pictures to reduce image file size. Choose a target resolution based on your intended use: HD (330 ppi) for screen viewing, Print (220 ppi) for printed handouts, or Email (96 ppi) for the smallest file size. In healthcare settings where presentations are often shared via email or uploaded to a learning management system (LMS), compression is essential.
Healthcare Connection
A nurse educator is preparing a training on proper wound care. She inserts clinical photographs, increases their brightness and contrast for clarity, crops them to focus on the relevant area, and compresses the images so the file can be uploaded to the clinic’s shared drive without exceeding the 25 MB email attachment limit.
Part 2 of 6
Part 2 of 6 — SmartArt Graphics: Visualizing Healthcare Processes
SmartArt is one of PowerPoint’s most powerful features for transforming text-based information into professional visual diagrams. Instead of describing a process in bullet points, you can display it as a visual flowchart, hierarchy, or cycle diagram that audiences grasp at a glance. For healthcare professionals, SmartArt is invaluable for illustrating clinical workflows, organizational structures, patient care pathways, and decision trees.
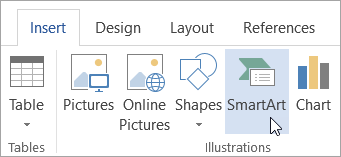
Inserting SmartArt
To create a SmartArt graphic, navigate to Insert > SmartArt. The Choose a SmartArt Graphic dialog box organizes available layouts into categories. Select a category from the left panel, browse the layouts in the center, and read a description on the right before selecting OK to insert it.
Insert SmartArt from the Insert tab to create professional diagrams and process flows — Microsoft Support
SmartArt Categories
Each SmartArt category is designed for a specific type of information. Select a tab to explore each category:
List – Displays non-sequential information or grouped items. Use for listing department responsibilities, patient rights, or clinic services.
Healthcare example: A slide listing the Patient Bill of Rights with each right in its own List block, making each item stand out more than a plain bulleted list.
Process – Shows steps in a sequential workflow with directional arrows. Ideal for patient check-in procedures, medication administration steps, or lab specimen handling protocols.
Healthcare example: Patient Arrives → Sign In at Kiosk → Insurance Verification → Vitals Taken → Provider Exam → Checkout.
Cycle – Illustrates a repeating process that loops continuously. Use for quality improvement cycles (Plan-Do-Study-Act), infection control review processes, or recurring scheduling patterns.
Healthcare example: The PDSA cycle — Plan → Do → Study → Act → (repeat) — displayed as a circular diagram.
Hierarchy – Displays organizational charts or ranked relationships. Perfect for clinic organizational charts, triage priority levels, or chain-of-command structures.
Healthcare example: An org chart showing the Clinic Director at the top, with Department Heads reporting to them, and Staff at the base level.
Relationship – Shows connections between concepts using overlapping or linked shapes. Use for illustrating how departments interact, how data flows between systems, or how patient care involves multiple stakeholders.
Healthcare example: A Venn diagram showing how EHR, Billing, Pharmacy, and Lab systems interconnect and share data.
Matrix – Displays components in quadrants. Useful for risk assessment matrices or priority grids used in healthcare quality improvement.
Pyramid – Shows proportional or hierarchical relationships. Applicable for illustrating Maslow’s hierarchy of needs in patient-centered care or triage classification levels.
Picture – Incorporates images into the diagram structure. Use when photos enhance understanding, such as showing equipment at each stage of a procedure.
Adding and Editing Text in SmartArt
After inserting a SmartArt graphic, a Text Pane appears to the left (toggle it with the small arrow on the left edge of the SmartArt). Type your content in the Text Pane — each line of text corresponds to a shape in the diagram. Press Enter to add a new shape, Tab to indent (creating a sub-item), and Shift+Tab to promote an item to a higher level. You can also select directly inside any shape on the diagram and type.
Formatting SmartArt
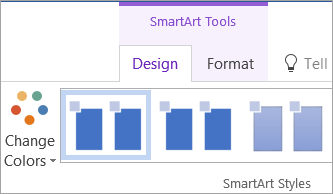
When a SmartArt graphic is selected, two contextual tabs appear on the Ribbon:
SmartArt Design tab – Change the overall layout, add or remove shapes, promote/demote items, switch to a different SmartArt type, apply color themes, and choose from SmartArt Styles (flat, 3D, polished, etc.).
Format tab – Customize individual shapes within the SmartArt: change fill colors, outlines, effects, text formatting, and size.
When selecting SmartArt colors, the Change Colors button offers palettes that coordinate with your presentation’s theme. For a healthcare presentation using a blue-and-teal color scheme, choose a palette from the “Colorful” or “Accent” groups that aligns with your organization’s branding.
Use the Change Colors button to apply different color schemes to your SmartArt — Microsoft Support
Healthcare Connection
A clinic manager uses a Process SmartArt to illustrate the patient check-in workflow: Patient Arrives → Sign In at Kiosk → Insurance Verification → Vitals Taken → Provider Exam → Checkout & Follow-Up. Each step is a distinct shape in the diagram, making the workflow immediately clear to new staff during orientation training.
SmartArt Category
What It Shows
Healthcare Use Examples
List
Non-sequential items or grouped information
Clinic services offered, patient bill of rights, employee onboarding checklist
Interdepartmental collaboration, patient care team roles, EHR data flow between systems
Matrix
Components in quadrant arrangement
Risk assessment grid, priority matrix for quality improvement initiatives
Pyramid
Proportional or hierarchical layers
Triage levels, Maslow's hierarchy in patient-centered care, healthcare career progression
Picture
Diagram with integrated images
Equipment at each procedure step, staff photos in organizational chart, facility tour guide
▶
PowerPoint Animation Tutorial• 12 min
Part 3 of 6
Part 3 of 6 — Audio and Video: Adding Multimedia to Presentations
Multimedia elements — audio clips, narration recordings, and video — transform a static slide deck into a rich, engaging learning experience. In healthcare training, multimedia is particularly effective: a video demonstration of a hand-hygiene technique or a narrated walkthrough of an EHR workflow communicates information that text and images alone cannot fully capture.
Inserting Audio
Navigate to Insert > Audio to access two audio sources:
Audio on My PC – Insert a pre-existing audio file (MP3, WAV, WMA, MIDI, or AAC). In a healthcare context, you might insert a short audio clip of a patient scenario to set the scene for a case study discussion.
Record Audio – Record your voice directly through PowerPoint using your computer’s microphone. A small recording dialog box appears where you name the clip, select Record, speak, and select Stop. The recording is embedded directly on the current slide.
Audio Playback Options
After inserting audio, a speaker icon appears on the slide. Select it to reveal the Audio Format and Playback tabs. Key playback options include:
Choose Automatically (plays when the slide appears), On Click (plays when the speaker icon is clicked), or In Click Sequence (plays as part of the animation sequence). For a training narration, Automatically is usually best; for optional audio, use On Click.
Play Across Slides – Check this box if the audio should continue playing through multiple slides, useful for background music during a slide show.
Hide During Show – Hides the speaker icon so the audience does not see it during the presentation.
Loop Until Stopped – Repeats the audio continuously. Useful for looping ambient sound in a kiosk-style waiting room display.
Drag the green (start) and red (end) markers on the audio waveform to trim the clip to the desired length. This is especially useful for trimming dead time at the beginning or end of a recording.
Recording Narration for an Entire Presentation
For self-paced e-learning modules, you can narrate your entire presentation by going to Slide Show > Record Slide Show. This feature records your voice alongside slide timings, allowing the presentation to play automatically with your narration. This is invaluable for creating patient education videos that can be played on a loop in a clinic waiting room or embedded in an online patient portal.
Inserting Video
Video adds a powerful dimension to healthcare training. Navigate to Insert > Video for two options:
This Device – Insert a video file stored on your computer. PowerPoint supports MP4, WMV, and AVI formats, with MP4 being the most universally compatible.
Online Video – Embed a video from a web source by pasting a URL or embed code. Note that online videos require an internet connection during playback.
Video Playback Controls
After inserting a video, the Video Format and Playback tabs provide controls for:
Trim Video – Set start and end points to show only a relevant portion of a longer recording.
Poster Frame – Set the image displayed before the video plays. Choose a specific frame from the video or insert a custom image.
Start options – Automatically or On Click, similar to audio settings.
Video styles, borders, and effects – Apply visual formatting to the video frame to match your presentation’s design.
Healthcare Connection
Healthcare Connection: A patient safety coordinator creates a training on proper sharps disposal. She inserts a 90-second MP4 video showing the correct technique, trims it to remove the first 5 seconds of dead time, sets it to play automatically when the slide appears, and adds a poster frame showing the sharps container so trainees know what to expect before the video begins.
Part 4 of 6
Part 4 of 6 — Slide Transitions: Creating Smooth Visual Flow
A transition is the visual effect that occurs when one slide replaces another during a slide show. Transitions guide the audience’s eye, signal topic changes, and create a polished viewing experience. However, overusing dramatic transitions can distract the audience and undermine your message — especially in professional healthcare presentations where clarity is paramount.
The Transitions tab provides a gallery of visual effects applied between slides — Microsoft Support
Applying Transitions
Select a slide (or multiple slides using Ctrl+Click), then navigate to the Transitions tab. The transition gallery displays effects organized into three categories:
✨
Subtle
Fade, Push, Wipe, Morph. Understated effects appropriate for most professional healthcare presentations.
⚡
Exciting
Vortex, Shred, Origami, Fracture. Dramatic effects — use sparingly and only when they reinforce the message.
▶
Dynamic Content
Pan, Conveyor, Rotate. Move individual objects on the slide, effective for data flow presentations.
Transition Options and Timing
Click Preview to see how your transition looks before presenting — Microsoft Support
After selecting a transition, configure its settings in the Timing group on the Transitions tab:
Sound – Add an optional sound effect that plays with the transition. In healthcare presentations, sound effects are generally inappropriate and distracting; use them only for special emphasis in informal or gamified training scenarios.
Duration – Control how long the transition takes, measured in seconds. A duration of 0.50 to 1.00 seconds is typical for professional presentations. Too fast feels abrupt; too slow feels sluggish.
Advance Slide – On Mouse Click – The slide advances when the presenter clicks the mouse or presses a key. This is the default for presenter-led sessions.
Advance Slide – After (seconds) – The slide advances automatically after a specified time interval. This is essential for self-running presentations, such as a patient education slide show on a waiting room screen.
Pro Tip
For a professional look, use the same transition throughout most of your presentation. Apply a transition to one slide, then select Apply To All to extend it to every slide. Reserve a different transition for specific moments that warrant visual emphasis — such as a section change or a key reveal.
The Morph Transition
The Morph transition is a powerful, modern effect available in Microsoft 365. It automatically animates the movement of objects from one slide to the next — if an image is in the top-left corner on Slide 1 and the center on Slide 2, Morph smoothly moves it between positions. This creates elegant motion effects without manually configuring animations. In a healthcare training, Morph can illustrate a patient’s journey through a facility by moving an icon from the reception area to the exam room to the lab across consecutive slides.
Healthcare Connection
Healthcare Connection: A health information manager creates a self-running presentation about HIPAA compliance for new employees. She applies a consistent Fade transition to all slides with a 0.70-second duration and sets each slide to advance automatically after 15 seconds, ensuring the presentation loops smoothly in the HR training room.
▶
How to Make a Video in PowerPoint• 15 min
Part 5 of 6
Part 5 of 6 — Object Animations: Controlling Content Reveal
While transitions control the movement between slides, animations control the movement of individual objects within a slide. Animations allow you to reveal bullet points one at a time, draw attention to a key image, or build a diagram piece by piece — directing the audience’s focus exactly where you want it. In healthcare training, purposeful animations can reinforce learning by revealing information progressively, preventing cognitive overload.
Animation Types
PowerPoint provides four categories of animation effects, each serving a different purpose:
↗
Entrance
Controls how an object appears on the slide. Examples: Appear, Fade In, Fly In, Float In, Zoom.
Controls how an object disappears. Examples: Fade Out, Fly Out, Float Out, Shrink & Turn.
➔
Motion Path
Moves an object along a defined path. Options: Lines, Arcs, Turns, Loops, Custom Path.
Entrance effects control how objects appear on the slide — Microsoft SupportEmphasis effects highlight objects already visible on the slide — Microsoft SupportExit effects control how objects leave the slide — Microsoft Support
Applying Animations
To animate an object, select it and navigate to the Animations tab. Select an animation from the gallery to apply it. Key settings include:
Effect Options – Modify the animation direction (e.g., Fly In from left, right, top, or bottom) or variation (e.g., Fade In by paragraph versus all at once).
Trigger – Determine when the animation plays: On Click (presenter clicks to trigger), With Previous (plays simultaneously with the preceding animation), or After Previous (plays automatically after the preceding animation finishes).
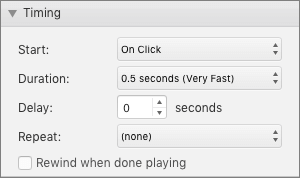
Duration – How long the animation takes to complete, in seconds. Shorter durations (0.25–0.50 seconds) feel snappy; longer durations (1.00–2.00 seconds) feel more gradual.
Delay – An optional pause before the animation starts, useful for staggering multiple animations.
Fine-tune animation timing — Start, Duration, Delay, and Repeat controls — Microsoft Support
The Animation Pane
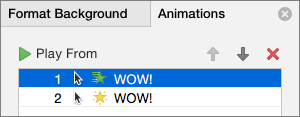
For slides with multiple animated objects, the Animation Pane (Animations tab > Animation Pane) is essential. It displays a chronological list of every animation on the current slide. From the Animation Pane, you can:
Reorder animations by dragging them up or down in the list.
Adjust timing relationships between animations (On Click, With Previous, After Previous).
Fine-tune durations and delays for precise control.
Preview the full animation sequence by selecting Play From.
The Animation Pane — control timing, sequence, and effect options for each animation — Microsoft Support
Best Practices for Healthcare Animations
Animations should serve a purpose, not decorate. Follow these guidelines for professional healthcare presentations:
Animate bullet points to appear one at a time using Appear or Fade In. This keeps the audience focused on the current point rather than reading ahead. In a medication safety training, revealing each of the Five Rights one at a time allows for thorough discussion of each.
Entrance animations control content flow naturally. Reserve emphasis and exit animations for special situations — such as drawing attention to a critical drug interaction alert (emphasis) or clearing a case study before the next one (exit).
Effects like Bounce, Swivel, and Spin can feel unprofessional in clinical training contexts. Stick to Appear, Fade, and Fly In for a polished look. If every object on a slide is animated differently, the audience focuses on the effects rather than the content. Use the same animation type for similar objects. Consider viewers with visual sensitivities or vestibular disorders — subtle, smooth animations are always the safest choice.
Healthcare Connection
A clinical educator builds a training slide on the “Five Rights of Medication Administration” (Right Patient, Right Drug, Right Dose, Right Route, Right Time). She uses a Fade In entrance animation triggered On Click for each bullet point, allowing her to discuss each Right thoroughly before revealing the next. The Animation Pane confirms the five animations play in the correct order.
Animation Type
What It Does
Examples
Appropriate Healthcare Use
Entrance
Controls how an object appears on the slide
Appear, Fade In, Fly In, Float In, Zoom
Revealing checklist items one at a time, introducing new concepts progressively
Emphasis
Highlights an object already on the slide
Pulse, Grow/Shrink, Spin, Bold Reveal
Drawing attention to a critical safety warning, highlighting a key statistic
Exit
Controls how an object leaves the slide
Fade Out, Fly Out, Float Out, Shrink & Turn
Removing a previous case study before revealing the next, clearing completed items
Motion Path
Moves an object along a defined path
Lines, Arcs, Turns, Loops, Custom Path
Illustrating patient flow through a facility, showing referral routing
Part 6 of 6
Part 6 of 6 — Creating Video Presentations and Accessibility
PowerPoint can do more than support live presentations — it can produce standalone video files and self-running presentations that reach audiences beyond the conference room. These features are increasingly important in healthcare, where training must reach staff across multiple shifts, remote workers, and even patients at home.
Recording a Slide Show
The Record Slide Show feature (Slide Show tab > Record Slide Show) captures your narration, slide timings, and optional webcam video as you present through each slide. PowerPoint records your voice through the microphone and your face through the webcam (if enabled), embedding both into the presentation file.
Recording Tips
Use a quiet room and an external microphone for clear audio. Speak at a moderate pace — healthcare terminology can be unfamiliar to new staff. Pause briefly between slides to create natural transitions. If you make a mistake on a slide, you can re-record just that slide without redoing the entire presentation.
Exporting as Video
To share your narrated presentation as a standalone video, navigate to File > Export > Create a Video. Choose a video quality:
Ultra HD (4K) – Highest quality, largest file. Best for presentations displayed on large screens or conference room displays.
Full HD (1080p) – Excellent quality, recommended for most healthcare training videos. Provides a great balance between visual quality and file size for LMS uploads.
HD (720p) – Good quality, smaller file. Suitable for LMS uploads or email distribution where bandwidth is a concern.
Standard (480p) – Lowest quality, smallest file. Acceptable for small-screen viewing or bandwidth-limited situations in remote clinics.
Choose whether to use recorded timings and narrations, then select Create Video. PowerPoint exports the file as an MP4 video that can be uploaded to an LMS, shared on a clinic’s intranet, or played on waiting room screens.
Accessibility: Making Multimedia Inclusive
Healthcare organizations serve diverse populations, including individuals with disabilities. Accessible presentations ensure that everyone can benefit from your content. PowerPoint provides several accessibility features you should use consistently:
Alt text for images – Select any image, right-click, choose Edit Alt Text, and type a concise description. For a photo of a nurse washing hands, good alt text would be: “Healthcare worker performing hand hygiene at a clinical sink using soap and water.”
Alt text for SmartArt and charts – SmartArt graphics and charts also need alt text describing the information they convey, not just their visual appearance.
Slide reading order – Navigate to Home > Arrange > Selection Pane to view and reorder objects on each slide. Screen readers read objects from bottom to top in the Selection Pane, so arrange items in the logical reading order.
Captions for audio and video – Add closed captions to embedded video using the Playback tab > Insert Captions feature (supports WebVTT caption files). For narrated presentations, use PowerPoint’s built-in Subtitles feature during live presentations.
Accessibility Checker – Run Review > Check Accessibility to scan your presentation for common issues. The checker flags missing alt text, low-contrast text, slides without titles, and other accessibility problems.
Healthcare Connection
A health information manager creates a HIPAA training video by recording narration over a 20-slide presentation and exporting it as a 1080p MP4 video. She adds alt text to every image, sets the correct reading order on each slide, and runs the Accessibility Checker before exporting. The final video is uploaded to the clinic’s LMS, where employees can complete the training on their own schedule — across all shifts and locations.
SmartArt Matchmaker: Healthcare Edition
Match each healthcare scenario to the best SmartArt category — 6 real-world challenges
Scenario
Scenario 1 of 6
★ 0/0
Which SmartArt type best fits this scenario?
0/6
Scenarios Matched Correctly
Knowledge Check
A clinic manager wants to create a visual diagram showing the sequential steps a patient follows from arrival to checkout: Arrive, Check In, Verify Insurance, Take Vitals, See Provider, Check Out. Which SmartArt category is BEST suited for this diagram?
Correct! The Process category is specifically designed for showing sequential steps in a workflow. A Process SmartArt arranges items in a directional flow (typically left to right or top to bottom), which is perfect for illustrating a patient's step-by-step journey from arrival through checkout. Hierarchy shows ranked relationships, Relationship shows connections between concepts, and Matrix displays items in quadrants.
Not quite. The correct answer is Process. Process SmartArt is specifically designed for showing sequential steps in a workflow — perfect for illustrating a patient's step-by-step journey from arrival through checkout.
Knowledge Check
A clinical educator is creating a training presentation and wants bullet points to appear one at a time so she can discuss each point before the next one is visible. Which animation approach is MOST appropriate?
Correct! A Fade In entrance animation triggered On Click is the most professional and effective approach. It provides a smooth, non-distracting appearance for each bullet, and the On Click trigger gives the presenter full control over when each point is revealed. Bounce is too casual for clinical training, Spin emphasis does not control when items appear, and random animations look unprofessional.
Not quite. The best approach is Fade In entrance animation triggered On Click. It provides a smooth, non-distracting appearance and gives the presenter full control over when each point is revealed. Bounce is too casual, Spin does not control appearance timing, and random animations look unprofessional.
Knowledge Check
A health educator has finished creating a training presentation with images, SmartArt, and an embedded video. Before distributing it to clinic staff, which accessibility step should she complete FIRST?
Correct! Running the Accessibility Checker (Review > Check Accessibility) is the essential first step before distributing a presentation. It automatically scans for missing alt text on images and SmartArt, slides without titles, incorrect reading order, and other accessibility barriers. The checker provides specific recommendations for fixing each issue.
Not quite. The correct answer is Run the Accessibility Checker (Review > Check Accessibility). It scans for missing alt text, slides without titles, incorrect reading order, and other barriers — providing specific recommendations for each issue. Colorful borders, excessive animations, and WordArt do not improve accessibility.
Lesson 3.2 Summary
PowerPoint’s Picture Format tab provides Corrections, Color adjustments, Crop, Remove Background, and Compress tools for refining images without external software.
SmartArt graphics transform text into professional visual diagrams — choose the category (List, Process, Cycle, Hierarchy, Relationship, Matrix, Pyramid, Picture) based on the type of information being visualized.
Audio and video can be inserted from files or recorded directly in PowerPoint; configure playback options (Start, Trim, Loop) for optimal training delivery.
Transitions control movement between slides — use Subtle effects (Fade, Morph) consistently for professional healthcare presentations.
Animations control individual objects within a slide — use Entrance animations (Fade In, Appear) with On Click triggers for progressive content reveal.
Record Slide Show captures narration and timings; Export as Video creates MP4 files for LMS distribution across shifts and locations.
Always run the Accessibility Checker, add alt text to all images and SmartArt, set correct reading order, and add captions to video before distributing.