Given an unformatted healthcare document, apply character and paragraph formatting to produce a professional document that meets clinic communication standards (CO-4)
Insert and format a table to organize structured healthcare data such as medication schedules, appointment logs, or eligibility criteria (CO-4)
Use Find and Replace to efficiently update terminology across a multi-page healthcare document without introducing errors (CO-4)
Analyze a poorly formatted patient-facing document and identify three specific formatting improvements that would enhance readability and professionalism (CO-4)
Part 1 of 6
Part 1: Character Formatting — Fonts, Sizes, and Text Effects
In the previous lesson, you learned to create and save Word documents. Now it is time to make those documents look professional. Formatting transforms plain text into polished, readable documents that convey competence and attention to detail — qualities that are essential in healthcare settings where documents may be reviewed by patients, supervisors, insurance companies, or regulatory agencies.
What Is Character Formatting?
Character formatting refers to any formatting applied to individual characters or selected text. This includes font family, font size, font color, and text effects like bold, italic, underline, strikethrough, subscript, and superscript. Character formatting is applied from the Font group on the Home tab of the Ribbon, or through the Font dialog box (press Ctrl+D).
Font Family
The font family (also called the typeface) determines the visual style of your text. Word includes hundreds of fonts, but in professional healthcare documents, readability should always be your primary concern. The most commonly used fonts in healthcare and business settings include:
Calibri — Word's default font since 2007. Clean, modern, and highly readable. Excellent for everyday office documents.
Arial — A widely used sans-serif font that is clean and professional. Common in healthcare forms and signage.
Times New Roman — A traditional serif font often required for formal reports, academic papers, and legal documents.
Verdana — Designed for screen readability, making it a good choice for documents that will be viewed primarily on computers or tablets.
To change the font, select your text and choose a new font from the Font dropdown on the Home tab. You can also type the font name directly into the dropdown box for faster access.
Font Size
Font size is measured in points (pt). Standard body text is 11pt or 12pt. Keep in mind that patient-facing documents should use at least 12pt, and documents for elderly patients or those with visual impairments should use 14pt or larger.
To change the font size, select your text and either choose a size from the Font Size dropdown, type a specific size directly into the box, or use the Increase Font Size (Ctrl+Shift+>) and Decrease Font Size (Ctrl+Shift+<) buttons.
Bold, Italic, Underline, and Other Effects
Text effects add emphasis and visual hierarchy to your documents:
Used for headings, key terms, warnings, and important instructions. In healthcare documents, bold text draws attention to critical information such as medication dosages or allergy alerts.
Used for emphasis, titles of publications, medical terminology in Latin, and introductory or explanatory notes.
Use sparingly in modern documents, as underlined text can be confused with hyperlinks. However, it is sometimes used in healthcare forms to indicate fill-in fields.
Font Color adds color to text for emphasis. In healthcare materials, red is often used for warnings, while blue may indicate links or references.
Text Highlight applies a colored background behind text, similar to a physical highlighter. Useful for marking text that needs review.
Accessibility Note
Accessibility Note: When using font colors, always ensure sufficient contrast between the text color and the background. The Web Content Accessibility Guidelines (WCAG) recommend a minimum contrast ratio of 4.5:1 for standard text.
Formatting Toolbar Quick Reference
Button/Tool
Location
Keyboard Shortcut
Purpose
Bold
Home > Font
Ctrl+B
Applies bold weight to selected text for emphasis on key terms and warnings
Italic
Home > Font
Ctrl+I
Applies italic style for emphasis, titles, and medical terminology
Underline
Home > Font
Ctrl+U
Underlines selected text; used for fill-in fields in healthcare forms
Font Color
Home > Font
(dropdown)
Changes text color for visual categorization and emphasis
Text Highlight
Home > Font
(dropdown)
Applies colored background behind text for review markup
Align Left
Home > Paragraph
Ctrl+L
Aligns text to the left margin (default for body text)
Center
Home > Paragraph
Ctrl+E
Centers text horizontally; used for titles and headings
Justify
Home > Paragraph
Ctrl+J
Aligns text flush with both margins for a formal appearance
Bullets
Home > Paragraph
(select button)
Creates an unordered bulleted list for symptoms, supplies, items
Numbering
Home > Paragraph
(select button)
Creates a numbered list for step-by-step procedures and protocols
Line Spacing
Home > Paragraph
(dropdown)
Adjusts the vertical distance between lines within a paragraph
Format Painter
Home > Clipboard
Ctrl+Shift+C / V
Copies formatting from one selection and applies it to another
Find and Replace
Home > Editing
Ctrl+H
Finds specific text and replaces it with different text throughout the document
Spelling & Grammar
Review > Proofing
F7
Checks the document for spelling and grammar errors
Part 2 of 6
Part 2: Paragraph Formatting — Alignment, Spacing, and Lists
Paragraph formatting controls the overall layout and appearance of entire paragraphs. It includes alignment, line spacing, indentation, and the use of bulleted or numbered lists. These settings are found in the Paragraph group on the Home tab.
Text Alignment
Alignment determines how text is positioned horizontally within the margins. Word offers four alignment options:
Left Align (Ctrl+L) – Text is flush with the left margin and ragged on the right. This is the default and most common alignment for body text in healthcare documents because it is the easiest to read.
Center (Ctrl+E) – Text is centered between the left and right margins. Used for titles, headings, and invitations. In healthcare, centered text is common on patient handout titles and flyer headlines.
Right Align (Ctrl+R) – Text is flush with the right margin and ragged on the left. Less common, but used for dates, page numbers, and return addresses in letters.
Justify (Ctrl+J) – Text is flush with both the left and right margins, with extra spacing added between words to fill each line evenly. This creates a formal, polished look and is often used in newsletters, brochures, and official reports.
Line Spacing and Paragraph Spacing
Line spacing controls the vertical distance between lines within a paragraph:
Single (1.0) — Lines are close together. Used in forms and compact documents where space is limited.
1.15 — Word's default. Slightly more open than single spacing for improved readability.
1.5 — A comfortable reading spacing, often used in educational materials and patient handouts.
Double (2.0) — Required for many academic papers and draft documents that need space for handwritten annotations.
Paragraph spacing (also called "before and after" spacing) adds space above or below a paragraph. This is different from pressing Enter to create blank lines — paragraph spacing is more precise and consistent. Using paragraph spacing instead of extra blank lines creates a more polished, professionally formatted document.
Indentation
Indentation moves text inward from the left or right margin. The most common types are:
First Line Indent — Indents only the first line of a paragraph. Traditional in formal writing, though less common in modern business and healthcare documents.
Hanging Indent — The first line is at the left margin while subsequent lines are indented. Used for reference lists and bibliographies.
Left/Right Indent — Moves the entire paragraph inward from the margin. Useful for block quotes, special notices, or offset text such as patient instructions within a longer document.
Bullets and Numbered Lists
Lists are one of the most effective formatting tools for healthcare documents because they present information in a clear, scannable format. Use bulleted lists when the items have no required order (e.g., a list of symptoms or items to bring to an appointment). Use numbered lists when sequence matters (e.g., step-by-step instructions for taking a medication or preparing for a procedure).
To create a list, select the Bullets or Numbering button in the Paragraph group on the Home tab. You can customize bullet symbols and numbering styles by selecting the dropdown arrow next to each button. Word also supports multilevel lists for creating outlines and nested items, which are useful for complex healthcare procedure documents.
▶
Word 2024 Complete Tutorial• Kevin Stratvert • 20 min
Part 3 of 6
Part 3: Inserting and Formatting Tables
Tables are indispensable in healthcare documentation. They organize structured data into rows and columns, making complex information easy to read and compare. In medical settings, tables are used for clinic schedules, staff contact lists, medication tracking charts, and lab result summaries.
Inserting a Table
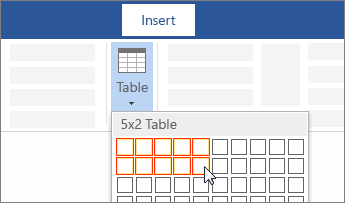
To insert a table in Word, navigate to the Insert tab and select Table. Options include:
Grid Selection — Hover over the grid to select the number of rows and columns (up to 10x8). Select to insert the table instantly.
Insert Table Dialog — Select "Insert Table..." for precise control over the number of rows, columns, and column width behavior (fixed, auto-fit to contents, or auto-fit to window).
Draw Table — Draw custom table borders with your mouse. Useful for complex, irregular table layouts.
Quick Tables — Pre-formatted table templates such as calendars, tabular lists, and matrices.
Insert a table by hovering over the grid to select the desired size — Microsoft Support
Working with Tables
Once a table is inserted, Word adds two new contextual tabs: Table Design and Table Layout.
The Table tab appears on the ribbon when a table is selected — Microsoft Support
The Table Design tab provides visual formatting options:
Table Styles — Pre-built color and formatting schemes. Select any style to apply it instantly. Styles that use your document's theme colors will update automatically if you change the theme.
Header Row — Formats the first row differently (often with a colored background and bold white text) to clearly label each column.
Banded Rows — Applies alternating row shading for easier reading. This is especially helpful in healthcare tables with many rows of data.
Borders and Shading — Customize the borders around and within the table, and add background colors to specific cells.
The Table Layout tab provides structural options:
Insert Rows/Columns — Add new rows above or below, or new columns to the left or right of the current cell.
Delete — Remove rows, columns, or the entire table.
Merge Cells — Combine two or more cells into one. Useful for creating section headers that span multiple columns.
Cell Size — Set exact row heights and column widths for precise control.
Alignment — Control how text is aligned within each cell (top, center, bottom and left, center, right).
Sort — Sort table data alphabetically or numerically by any column.
Healthcare Scenario
Healthcare Scenario: You are the front desk coordinator at Valley View Medical Center. The office manager asks you to create a table showing the clinic’s weekly hours for each department. You insert a 4-column, 7-row table with columns for Department, Weekday Hours, Saturday Hours, and Phone Extension. You apply a professional table style with a navy header row and alternating row shading.
Part 4 of 6
Part 4: Inserting Graphics, Images, and Other Visual Elements
Visual elements such as images, shapes, icons, and text boxes enhance the readability and professional appearance of healthcare documents.
Inserting Pictures
To insert an image, go to the Insert tab and select Pictures. Word offers two options:
This Device — Insert an image file stored on your computer (JPEG, PNG, GIF, BMP, etc.)
Online Pictures — Search for stock photos and creative commons images from within Word using Bing Image Search
After inserting an image, select it to display the Picture Format contextual tab. Key tools include resize (drag corner handles), crop, text wrapping, and picture styles.
↔
Resize
Drag the corner handles to resize proportionally. Avoid dragging side handles, which can distort the image.
✂
Crop
Remove unwanted parts of the image. Select Crop on the Picture Format tab, then drag the crop handles.
↺
Text Wrapping
Controls how text flows around the image: In Line, Square, Tight, Behind Text, or In Front of Text.
★
Picture Styles
Apply borders, shadows, reflections, and other visual effects to enhance the image appearance.
Inserting Shapes and Text Boxes
The Shapes gallery (Insert > Shapes) provides lines, arrows, rectangles, circles, callouts, and flowchart elements. Text boxes (Insert > Text Box) are rectangular containers that hold text and can be positioned anywhere on the page.
Text boxes are rectangular containers that hold text and can be positioned anywhere on the page. They are useful for sidebar content, callout boxes, and pull quotes. To insert a text box, go to Insert > Text Box and choose from built-in styles or draw your own.
Headers and Footers
Headers and footers appear at the top and bottom of every page. They are commonly used for:
Organization name and logo — Branding on every page of the document
Document title — Especially in multi-page reports
Page numbers — Essential for documents longer than two pages
Date or version number — Helps recipients verify they have the current version
Confidentiality notices — Required on documents containing patient information
To insert a header or footer, go to Insert > Header or Insert > Footer and choose from built-in designs, or select Edit Header/Edit Footer to create a custom one. You can also insert page numbers directly from Insert > Page Number.
Healthcare Scenario
Healthcare Scenario: Your clinic director asks you to create a patient information handout about diabetes self-management. You insert the clinic logo in the header, add a relevant stock photo, and insert a text box with a callout: “Always consult your healthcare provider before making changes to your medication or diet.” The footer includes the clinic name, phone number, and page numbers.
▶
Top 15 Word Tips & Tricks• 12 min
Part 5 of 6
Part 5: Page Setup and Document Layout
Page setup options control the overall physical layout of your document — how it will appear when printed or viewed in Print Layout mode. These settings are found on the Layout tab of the Ribbon.
Margins
Margins are the blank spaces between the text and the edges of the page. Word's default margins are 1 inch on all sides, which works well for most healthcare documents. However, you may need to adjust margins for specific purposes:
Narrow margins (0.5 inch) — When you need to fit more content on a page, such as a dense reference chart or a multi-column patient handout
Wide margins (1.25 or 1.5 inch) — When documents will be hole-punched for binders, or when you want a more spacious, readable layout
Custom margins — For documents with specific requirements, such as letterhead with a pre-printed logo area at the top
To change margins, go to Layout > Margins and select from presets, or select Custom Margins for precise control.
Page Orientation
Word offers two page orientations:
Portrait (vertical) — The default orientation. Taller than it is wide. Best for letters, memos, reports, and most healthcare documents.
Landscape (horizontal) — Wider than it is tall. Best for wide tables, charts, timelines, and certificates. In healthcare, landscape orientation is often used for scheduling grids, comparison charts, and printed certificates of completion.
Page Breaks and Section Breaks
A page break forces the text following it to start on a new page. Insert a page break by pressing Ctrl+Enter or going to Insert > Page Break. Use page breaks instead of pressing Enter repeatedly — this ensures your document reflows correctly if you add or remove content above the break.
A section break divides your document into sections that can have different formatting. For example, you might want the first page of a clinic report in portrait orientation with different margins, while the second page is landscape with a wide table. Section breaks (found under Layout > Breaks) make this possible. Each section can have its own headers, footers, margins, orientation, and page numbering.
Pro Tip
Never use multiple blank lines (pressing Enter repeatedly) to push text to a new page. If someone adds a sentence above that point, all your manual spacing shifts, causing your formatting to break. Always use Ctrl+Enter for page breaks — this is a professional habit that will save you hours of reformatting.
Part 6 of 6
Part 6: Find and Replace, Spelling and Grammar, and the Format Painter
Word includes several powerful editing tools that help you work efficiently and maintain accuracy in your documents — both of which are critical in healthcare settings where errors can have serious consequences.
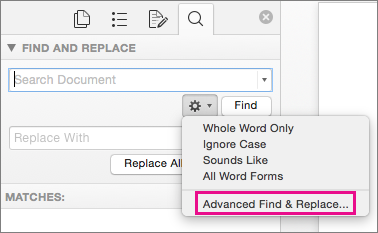
The Find and Replace feature (Ctrl+H) allows you to locate specific text in your document and optionally replace it with different text. The Find pane (Ctrl+F) opens the Navigation pane showing all instances of your search term. Replace All changes every instance simultaneously — use with caution and always review the results.
The Find pane (Ctrl+F) opens the Navigation pane on the left side of the screen, showing all instances of your search term with surrounding context. You can select any result to jump directly to that location in the document.
The Replace function (accessed from Find and Replace dialog or Ctrl+H) lets you specify both the text to find and the replacement text. You can replace occurrences one at a time or use Replace All to change every instance simultaneously. Use Replace All with caution — always review the results to ensure no unintended replacements were made.
The Find and Replace dialog (Ctrl+H) — search and replace text throughout your document — Microsoft Support
Healthcare Example
Healthcare Example: Your clinic recently merged and the official name changed from “Sunrise Family Practice” to “Sunrise-Valley Family Medicine.” You have a 20-page employee handbook that references the old name dozens of times. Press Ctrl+H, type the old name in the “Find what” field and the new name in the “Replace with” field, then select Replace All. Word updates every instance in seconds.
Spelling and Grammar Check
Word continuously checks your spelling and grammar as you type:
Red wavy underline — Indicates a possible spelling error. Right-click the word to see suggested corrections, add it to the dictionary, or ignore the suggestion.
Blue double underline — Indicates a possible grammar or style issue (such as subject-verb disagreement, passive voice, or informal language). Right-click to see suggestions.
You can also run a comprehensive review by pressing F7 or going to Review > Spelling & Grammar. This opens the Editor pane, which walks through each issue one at a time. In healthcare documentation, always run a spelling and grammar check before finalizing any document — errors in patient-facing materials undermine your organization's credibility, and errors in clinical documentation can lead to misunderstandings about patient care.
Be aware that Word's spell checker may not recognize specialized medical terminology. Words like tachycardia, hemoglobin, or acetaminophen may be flagged as misspelled even when they are correct. You can add these terms to your custom dictionary so Word recognizes them in the future (right-click the term and select "Add to Dictionary").
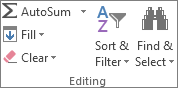
The Format Painter
The Format Painter button (paintbrush icon) copies formatting from one selection to another — double-click it to apply formatting to multiple locations — Microsoft Support: Format Painter
The Format Painter is one of the most useful — and underused — tools in Word. It copies all formatting from one selection and applies it to another, saving you the time of manually setting font, size, color, spacing, and other attributes for each section of your document.
To use the Format Painter:
Select the text that has the formatting you want to copy.
Select the Format Painter button (paintbrush icon) in the Clipboard group on the Home tab.
Your cursor changes to a paintbrush. Select or drag over the text you want to apply the formatting to.
Double-click the Format Painter button to lock it on, allowing you to apply the same formatting to multiple selections. Press Esc to turn it off.
Creating a Formatted Patient Information Sheet: Step-by-Step
Let us bring all of these formatting skills together with a practical healthcare scenario. Imagine you need to create a patient information sheet about preparing for a blood draw:
Open a blank document. Set the margins to 1 inch (the default). Set the font to Arial 12pt for the body text.
Type “Preparing for Your Blood Draw” and format it as Arial 16pt, Bold, Center-aligned. Use a dark blue font color for a professional healthcare appearance.
Insert the clinic name and contact information in the document header. Add the clinic logo image if available.
Type a brief introductory paragraph in Arial 12pt, Left-aligned, 1.15 line spacing. Then add the preparation steps as a numbered list:
Drink plenty of water the day before
Wear a short-sleeved shirt
Eat a light meal 1-2 hours before your appointment
Bring your insurance card and photo ID
Arrive 10 minutes early to complete paperwork
Insert a text box with a warning: “If you are taking blood-thinning medications, inform the phlebotomist before your draw.” Format the text box with a light yellow background and a bold red heading. Then add a table listing common lab tests, their purposes, and typical fasting requirements.
Add page numbers in the footer. Run Spelling and Grammar check. Review in Print Preview. Save as both .docx and .pdf.
Document Makeover: Patient Handout Edition
Identify formatting problems in a poorly formatted patient handout and select the correct fix — 6 real-world issues
Patient Handout Preview
Problem
Issue 1 of 6
★ 0/0
Select the correct fix for this formatting problem:
0/6
Formatting Issues Fixed
Knowledge Check
A healthcare office is creating a patient handout for elderly patients with visual impairments. What is the MINIMUM recommended font size for such a document?
Correct! For patients with visual impairments or elderly patients, documents should use 14pt or larger font to ensure readability. Standard business documents typically use 11pt or 12pt, but healthcare documents intended for patients with visual challenges should prioritize accessibility by using larger type sizes.
Not quite. The recommended minimum for elderly patients or those with visual impairments is 14pt or larger. While 11-12pt is the standard for general audiences, accessibility guidelines recommend significantly larger text for patients who may have difficulty reading.
Knowledge Check
A medical assistant is creating a document with instructions for patients preparing for surgery. The instructions must be followed in a specific sequence. Which formatting tool is MOST appropriate?
Correct! A numbered list is the correct choice when items must be followed in a specific sequence or order, such as step-by-step surgical preparation instructions. Numbered lists clearly communicate that the order matters, which is critical for patient safety in healthcare procedures.
Not quite. A numbered list is the best choice here. Bulleted lists are used when items have no required order (e.g., a list of supplies). Numbered lists clearly communicate that the order matters — critical for patient safety in healthcare procedures.
Knowledge Check
A clinic's name has changed from "Metro Health Clinic" to "Metro Health Partners." The office administrator needs to update a 30-page policy manual that references the old name over 50 times. What is the MOST efficient approach?
Correct! Find and Replace (Ctrl+H) is the most efficient tool for this task. You type the old name in the "Find what" field and the new name in the "Replace with" field, then select Replace All. Word updates every instance throughout the entire document in seconds. After using Replace All, you should review the results to confirm all replacements were correct.
Not quite.Find and Replace (Ctrl+H) is the most efficient approach. It can update all 50+ instances in seconds. The Format Painter copies formatting, not text content, so it would not help here. Manually searching or retyping would be extremely inefficient.
Lesson 2.2 Summary
Character formatting (font, size, bold, italic, color) transforms plain text into professional, readable documents.
Paragraph formatting (alignment, spacing, indentation, lists) controls the overall layout and visual structure of your content.
Tables organize structured healthcare data into rows and columns — use Table Design and Table Layout tabs for professional styling.
Images, shapes, text boxes, headers, and footers add visual elements and branding to healthcare documents.
Page setup (margins, orientation, breaks) controls the physical layout of printed and on-screen documents.
Find and Replace, Spelling and Grammar, and the Format Painter are essential tools for efficient, accurate editing in healthcare settings.