Apply built-in Heading styles and themes to a healthcare document so that it generates an automatic Table of Contents and maintains visual consistency (CO-4)
Customize a Word template for a standardized healthcare form (intake, consent, or policy document) that can be reused across the organization (CO-4)
Add headers, footers, and page numbers to a multi-page document to meet professional healthcare documentation standards (CO-4)
Evaluate two versions of the same healthcare document — one using manual formatting, one using styles — and explain why styles improve efficiency, consistency, and accessibility (CO-4)
Part 1 of 6
Part 1: Understanding Styles — The Foundation of Professional Documents
In the previous two lessons, you learned to create Word documents, enter and edit text, and apply manual formatting. While manual formatting works well for short documents, it quickly becomes tedious and inconsistent for longer ones — especially documents that must follow organizational standards. That's where Styles become essential.
What Are Styles?
A style is a predefined set of formatting instructions saved under a single name. When you apply a style to text, all the formatting associated with that style is applied at once. For example, the built-in "Heading 1" style might format text as Calibri Light, 16pt, Bold, Dark Blue, with 12pt spacing before the paragraph. Instead of manually setting each of these attributes every time you create a heading, you simply select the text and select "Heading 1" — and all the formatting is applied instantly.
The Styles gallery provides one-click access to predefined formatting combinations — Microsoft Support
Word comes with dozens of built-in styles, organized in the Styles gallery on the Home tab. The most commonly used styles include:
Normal — The default body text style. Applied to regular paragraph text.
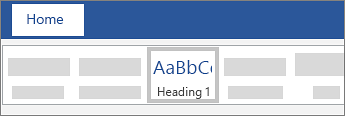
Heading 1 — The top-level heading style. Used for major section titles.
Heading 2 — A second-level heading for subsections within a Heading 1 section.
Heading 3 — A third-level heading for further subdivisions.
Title — A large, prominent style for the document title.
Subtitle — A complementary style for a subtitle or tagline below the title.
Quote / Intense Quote — Formatted for block quotations or callout text.
List Paragraph — The default style for bulleted and numbered lists.
Why Styles Matter in Healthcare
In healthcare organizations, consistency is not optional — it is a professional and often regulatory requirement. When every policy document, patient form, and internal memo uses the same heading styles, font choices, and spacing, the result is a cohesive organizational identity that conveys professionalism and reliability. Styles make this consistency achievable even when multiple people contribute to documents over time.
Styles also provide structural benefits beyond appearance:
Navigation Pane — When you use heading styles, Word can display a clickable document outline in the Navigation Pane (View > Navigation Pane), allowing you to jump instantly to any section. This is invaluable for long healthcare documents like procedure manuals and compliance handbooks.
Table of Contents — Word generates automatic Tables of Contents based on heading styles. We will explore this later in this lesson.
Accessibility — Screen readers used by visually impaired individuals rely on heading styles to navigate documents. Without properly applied heading styles, assistive technology cannot distinguish headings from body text, making the document inaccessible.
Applying Styles
To apply a style, select the text (or place your cursor in the paragraph), then select the desired style in the Styles gallery on the Home tab.
Apply Heading styles from the Home tab — the TOC builds from these headings — Microsoft Support
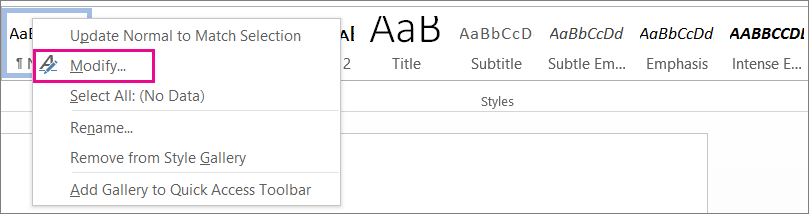
Modifying and Creating Custom Styles
Right-click any style and choose Modify to customize fonts, spacing, and formatting — Microsoft Support
Built-in styles are a great starting point, but you may need to customize them to match your organization's branding or documentation standards. Expand the steps below to learn how:
Right-click the style name in the Styles gallery or Styles pane.
Select Modify.
In the Modify Style dialog box, change the font, size, color, spacing, alignment, or any other attribute.
The Modify Style dialog lets you control every aspect of a style's formatting — Microsoft Support
Choose whether the modification applies to Only in this document or New documents based on this template.
Choose whether your style changes apply only to the current document or to all new documents — Microsoft Support
Select OK.
All text using that style updates automatically throughout the document.
Select the New Style button at the bottom of the Styles pane.
Give it a descriptive name (e.g., “Clinic Policy Heading” or “Patient Instructions Body”).
Configure all the formatting — font, size, color, spacing, alignment.
Choose whether to save it to this document only or to the template.
Select OK to save.
Custom styles are a powerful way to enforce healthcare document standards across your organization.
Healthcare Connection
When every policy document, patient form, and internal memo uses the same heading styles, font choices, and spacing, the result is a cohesive organizational identity that conveys professionalism and reliability. Styles also enable screen reader navigation — a critical accessibility requirement in organizations serving diverse patient populations.
Part 2 of 6
Part 2: Themes — Coordinated Design at the Document Level
While styles control the formatting of individual text elements, themes control the overall visual design of the entire document. A theme is a coordinated set of colors, fonts, and effects that work together to give your document a unified, professional appearance.
What a Theme Includes
Every Word theme has three components:
Theme Colors — A palette of 12 coordinated colors used throughout the document for text, headings, accents, hyperlinks, and backgrounds. When you change the theme colors, all elements that reference theme colors update automatically.
Theme Fonts — Two font selections: one for headings and one for body text. Changing the theme fonts updates all text that uses heading and body styles.
Theme Effects — Visual effects for shapes, charts, and SmartArt, including line styles, fill patterns, and shadow effects.
Applying and Customizing Themes
To apply a theme, go to the Design tab and select Themes. You will see a gallery of built-in themes with names like Office, Facet, Integral, Ion, Organic, Retrospect, and Slice. Hover over any theme to see a live preview of how it will change your document's appearance. Select to apply it.
You can also customize individual theme components:
Design > Colors — Change the color palette without changing fonts or effects
Design > Fonts — Change the heading and body fonts without changing colors or effects
Design > Effects — Change shape and graphic effects
To save a customized combination, select Themes > Save Current Theme.
Themes vs. Styles: What Is the Difference?
The relationship between themes and styles can be confusing at first, but the distinction is straightforward once you understand it:
Themes set the overall palette — the available colors, fonts, and effects for the entire document.
Styles apply specific combinations of those theme elements to individual text elements.
When you change a theme, all styles that reference theme colors and fonts update automatically. This means you can completely redesign a document's appearance by switching themes — without changing any styles manually. This is incredibly efficient for healthcare organizations that may need to produce the same content with different branding (for example, a parent health system and its subsidiary clinics).
Feature
Styles
Themes
Templates
What it controls
Formatting of individual text elements (headings, body, quotes, lists)
Overall document color palette, font pair, and graphic effects
Complete document layout including styles, themes, content placeholders, and page design
Where to find it
Home tab > Styles gallery and Styles pane
Design tab > Themes, Colors, Fonts, Effects
File > New > template gallery or search
Scope
Applied to selected text or paragraphs
Applied to the entire document at once
Applied when creating a new document; sets the starting point
Can be customized?
Yes — modify existing or create new styles
Yes — customize colors, fonts, effects, and save as new theme
Yes — modify a template and save it for reuse
Healthcare example
"Policy Heading" style: Arial 14pt Bold Navy for all section headings
"UMA Healthcare" theme: Navy/blue palette with Inter headings and Calibri body
"Patient Intake Form" template: pre-designed form with logo, fields, and formatting
Key benefit
Ensures consistent formatting of text elements throughout a document
Provides a unified visual identity that updates all styles simultaneously
Provides a reusable starting point that eliminates repetitive document setup
Best used when
Formatting text in any document for consistency and accessibility
Applying organizational branding to an existing document
Creating new documents that follow a standardized layout
▶
How to Create Branded Templates• Kevin Stratvert • 10 min
Knowledge Check
A healthcare organization wants all policy documents to have consistent formatting, generate automatic Tables of Contents, and be navigable by screen readers for accessibility compliance. Which Word feature is MOST essential to achieve all three of these goals?
Correct! Styles are the most essential feature for achieving all three goals. Styles ensure consistent formatting of headings and body text. Word's automatic Table of Contents is generated based on heading styles (Heading 1, Heading 2, etc.). Screen readers rely on heading styles to navigate document structure, making styles critical for accessibility. Themes control colors and fonts, templates provide starting layouts, and building blocks offer reusable content — but only styles directly enable all three requirements simultaneously.
Not quite. The correct answer is Styles. Styles enable consistent formatting, automatic Table of Contents generation (based on Heading 1, Heading 2, etc.), and screen reader navigation — all three goals. Themes only control the color palette and fonts; templates provide starting layouts; building blocks offer reusable content chunks.
Part 3 of 6
Part 3: Templates — Reusable Document Blueprints
A template is a pre-designed document that serves as a starting point for new documents. Templates combine styles, themes, page layout settings, content placeholders, and sometimes pre-written text into a single reusable file. When you create a new document from a template, Word generates a copy — the original template remains unchanged and ready for the next use.
Built-In and Online Templates
Word provides a rich library of templates accessible from File > New. Common template categories useful in healthcare include:
Letters — Business letters, cover letters, and personal correspondence
Resumes — Professional resume and CV layouts
Reports — Business reports, project reports, and academic papers
Flyers — Event flyers, promotional materials, and announcements
Newsletters — Multi-column newsletter layouts with image placeholders
Fax Cover Sheets — Still commonly used in healthcare for transmitting records
Forms — Registration forms, feedback forms, and surveys
Agendas and Meeting Notes — Structured layouts for meetings and committees
Finding and Using Healthcare Templates
Healthcare professionals frequently need standardized documents for recurring tasks. Templates eliminate the need to recreate these documents from scratch every time. Here are some templates particularly useful in healthcare settings:
Patient intake forms — Collect patient demographics, insurance information, medical history, and consent
Appointment reminder letters — Standard letters sent to patients confirming upcoming appointments
Referral letters — Professional letters referring patients to specialists or other facilities
Medical office memos — Internal communications about policies, procedures, or announcements
Health education flyers — Patient-facing materials about conditions, procedures, or wellness topics
Meeting agendas — Structured agendas for staff meetings, quality improvement committees, or safety huddles
Healthcare Scenario
Healthcare Scenario: You are a medical office assistant at Lakeside Community Health Center. The office manager asks you to create a patient intake form for a new specialty clinic. Instead of building the form from scratch, you go to File > New, search for “patient intake form,” find a suitable template, customize the fields, apply the clinic’s theme colors and logo, and save it as a new template for future use.
Creating Your Own Templates
When your organization has specific document requirements that are not met by built-in templates, you can create your own. Expand the steps below:
Create a new document and design it exactly as you want the template to appear — include styles, themes, logos, headers, footers, placeholder text, and any standard content.
Go to File > Save As.
In the “Save as type” dropdown, select Word Template (*.dotx).
Give the template a descriptive name and save it. Templates are saved to the Custom Office Templates folder by default.
The template now appears in the Personal section of File > New.
In healthcare offices with shared network drives, custom templates can be stored on the network so all staff have access to the same standardized forms and documents.
Template Type
Description
Key Elements
Healthcare Application
Patient Intake Form
Collects patient demographics, insurance, and medical history
Form fields, checkboxes, signature lines, HIPAA notice
New patient registration at clinics, hospitals, and specialty practices
Referral Letter
Professional letter referring a patient to another provider
Letterhead, patient info block, clinical summary, provider signature
Primary care to specialist referrals, inter-facility transfers
Office Memo
Internal communication to staff about policies or announcements
To/From/Date/Subject header, body text, distribution list
Promotional document for health events or campaigns
Eye-catching title, event details, images, call to action
Blood drives, flu shot clinics, health fairs, wellness workshops
Part 4 of 6
Part 4: Building Blocks and Quick Parts
Building blocks are reusable pieces of content that you can insert into any document with just a few clicks. Think of them as pre-made "chunks" of a document — a formatted header, a disclaimer paragraph, a logo block, or a pre-built table — that you use frequently and want to insert without recreating them each time.
Types of Building Blocks
Word includes several categories of building blocks, all accessible from the Insert tab. Select each tab to learn more:
Quick Parts are custom content blocks that you create and save for reuse. To create one: type and format the content, select it, go to Insert > Quick Parts > Save Selection to Quick Part Gallery, give it a descriptive name (e.g., “Clinic Disclaimer” or “HIPAA Notice”), and select OK.
To create a custom Quick Part: type and format the content you want to reuse, select it, go to Insert > Quick Parts > Save Selection to Quick Part Gallery, give it a descriptive name (e.g., "Clinic Disclaimer" or "HIPAA Notice"), choose a category, and select OK.
AutoText is a type of Quick Part specifically designed for frequently typed text. For example, you could save your clinic’s full address, a standard disclaimer paragraph, or a HIPAA notice as AutoText and insert it with a few keystrokes. AutoText entries are stored in the Normal template.
AutoText entries are stored in the Normal template, making them available in all your documents.
Cover Pages are pre-designed first pages for reports and formal documents. Access from Insert > Cover Page. They include professionally designed layouts with placeholders for document title, subtitle, author, date, and organization name — ideal for policy manuals and training materials.
They include professionally designed layouts with placeholders for document title, subtitle, author, date, and organization name — ideal for policy manuals, annual reports, and training materials.
Headers and Footers are pre-designed header and footer layouts. Healthcare documents commonly use headers for the organization name and logo, and footers for “Confidential — Internal Use Only” disclaimers, document version numbers, and automatic page numbers.
Healthcare documents commonly use headers for the organization name and logo, and footers for "Confidential — Internal Use Only" disclaimers, document version numbers, and automatic page numbers.
Page Numbers offer various formats and positions for numbering your document pages. You can place page numbers at the top or bottom of the page, in the margin, or at the current position. Formats include plain numbers, “Page X of Y,” and decorative styles.
You can place page numbers at the top or bottom of the page, in the margin, or at the current position. Formats include plain numbers, "Page X of Y," and decorative styles.
Healthcare Example
Many healthcare documents require a standard HIPAA privacy notice or confidentiality disclaimer at the bottom. Rather than typing and formatting this paragraph every time, you save it as a Quick Part called "HIPAA Disclaimer." Now, in any document, you can insert the complete, properly formatted disclaimer in two clicks. This saves time and ensures the exact approved language is used every time — a critical compliance requirement.
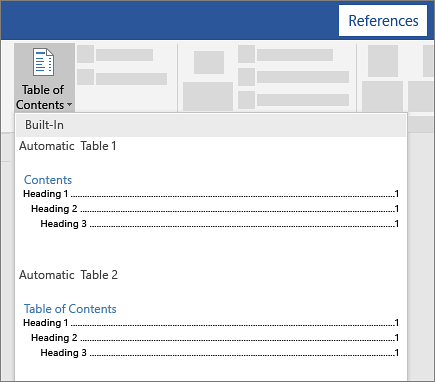
Long healthcare documents such as policy manuals, employee handbooks, procedure guides, and quality improvement reports require a Table of Contents (TOC) to help readers find information quickly. Word can generate a TOC automatically based on the heading styles you have applied.
Creating an Automatic Table of Contents
Apply heading styles throughout your document. Use Heading 1 for major sections, Heading 2 for subsections, and Heading 3 for further subdivisions. This is why using styles consistently is so important — the TOC relies on them entirely.
Position your cursor where you want the TOC to appear (typically at the beginning of the document, after the title page).
Go to References > Table of Contents.
Choose from the built-in TOC formats (Automatic Table 1 or Automatic Table 2), or select Custom Table of Contents for more control.
Word generates the TOC instantly, complete with section titles and page numbers.
Insert a Table of Contents from the References tab — automatic styles build from your headings — Microsoft Support
Updating the Table of Contents
As you add, remove, or rearrange content, the TOC will need to be updated. Select anywhere inside the TOC and press F9 or select Update Table. Choose:
Update page numbers only — Use this when you have only added or removed text, and the page numbers have shifted but the headings remain the same.
Update entire table — Use this when you have added, changed, or deleted headings. This rebuilds the TOC from scratch.
Pro Tip
Pro Tip: Always update the TOC as the last step before printing or distributing a document. An inaccurate TOC with wrong page numbers undermines the professionalism of the document.
Document Properties and Metadata
Document properties (metadata) are descriptive details stored within the file. To view and edit them, go to File > Info. Key properties include Title, Author, Subject, Keywords, Comments, and Company. In healthcare:
T
Title
The document's official title, used by search and document management systems.
✎
Author
The person who created or last edited the document.
📄
Subject
A brief description of the document's topic or purpose.
🔖
Keywords
Searchable terms associated with the document for easy retrieval.
💬
Comments
Notes about the document, such as "Draft — pending legal review."
🏢
Company
The organization name associated with the document.
Why Document Properties Matter in Healthcare
Document management — Properties help you search for and organize files in Windows File Explorer and SharePoint.
Version tracking — The "Comments" field can note the document version, approval status, or review history.
Compliance — Some regulatory frameworks require documents to include specific metadata (author, creation date, approval status).
Privacy — Be aware that document properties may contain personal information (author name, organization) that you might want to remove before sharing externally. Word's Document Inspector (File > Info > Check for Issues > Inspect Document) can find and remove hidden metadata.
Part 6 of 6
Part 6: Putting It All Together — Creating a Professional Healthcare Policy Document
To conclude this lesson and this week's study of Microsoft Word, let us walk through a comprehensive scenario that brings together styles, themes, templates, building blocks, and document properties — all the professional tools you have learned.
Scenario
You are a healthcare administrator at Mountain View Medical Group. The compliance officer has asked you to create a new "Infection Control Policy" document that will be distributed to all staff. The document must be 8–10 pages, professionally formatted, consistently styled, include a table of contents, and carry the organization's branding. Here is how you would approach this task using the tools you learned today.
Step-by-Step Process
Start with a template or blank document. Search for “policy” in the template gallery. If you find a suitable template, use it as a starting point.
Apply the organizational theme. Go to Design > Themes and select the custom Mountain View Medical Group theme.
Set up styles for the document. Ensure Heading 1, Heading 2, and Heading 3 styles are formatted to match your organizational standards.
Create the document structure using styles. Type your section headings — Purpose, Scope, Definitions, Policy Statement, Procedures, Responsibilities, Compliance, References — and apply Heading 1 to each. Add subsection headings with Heading 2. The Navigation Pane now shows a complete outline you can use to jump between sections.
Add headers and footers. Insert the clinic logo and name in the header. Add "Confidential — Internal Use Only" and automatic page numbers in the footer.
Insert building blocks. Use your saved HIPAA Disclaimer Quick Part in the compliance section. Insert a pre-built cover page and a “Document Revision History” table from your saved Quick Parts.
Generate the Table of Contents. Position your cursor after the cover page and insert an Automatic Table of Contents from References > Table of Contents.
Set document properties. Go to File > Info and set the Title ("Infection Control Policy"), Author, Subject ("Infection Prevention and Control"), Keywords ("infection control, policy, compliance, OSHA"), and add a comment noting "Version 1.0 — Pending compliance review."
Final review. Run Spelling and Grammar check. Review in Print Preview. Update the Table of Contents one final time (F9). Save as .docx for editing and .pdf for distribution.
This workflow demonstrates how professional document tools transform a potentially overwhelming task into a systematic, efficient process. Instead of spending hours manually formatting each heading, adjusting colors, and positioning elements, you let styles, themes, templates, and building blocks do the heavy lifting — allowing you to focus on what matters most: the content.
As you progress in your healthcare career, these skills will serve you in countless situations — from simple office memos to complex policy manuals, patient education materials, committee reports, and grant applications. The tools you have learned this week in Microsoft Word form the foundation of professional document creation that will set you apart as a competent, detail-oriented healthcare professional.
Key Takeaway
Professional document tools — Styles, Themes, Templates, Building Blocks, and Document Properties — work together as a system. Mastering their interplay allows you to create consistent, accessible, and branded documents efficiently, regardless of length or complexity.
Document Detective: Style, Theme, or Template?
Match 6 healthcare document needs to the right approach — test your knowledge of professional document tools
🔍
Case File
Case 1 of 6
★ 0/0
Which approach solves this document need?
0/6
Cases Solved Correctly
Knowledge Check
A medical office creates the same patient intake form every time a new specialty clinic opens. The form always has the same layout, logo, fields, and formatting. Which Word feature is the BEST tool for this recurring need?
Correct! A Word template (.dotx) is the best solution for documents that are created repeatedly with the same layout, formatting, and standard content. Saving the patient intake form as a template means that every time a new clinic opens, staff can go to File > New, select the template, and have a perfectly formatted form ready to customize. The original template remains unchanged. A theme only controls colors and fonts; the Format Painter is manual and time-consuming; and modifying the Normal style would affect all documents, not just the intake form.
Not quite. The best answer is to save the form as a Word template (.dotx). Templates are designed exactly for this purpose — reusable document blueprints that preserve layout, formatting, and standard content. Each new clinic gets a fresh copy to customize while the original template stays intact.
Knowledge Check
After adding three new sections to a 25-page clinic policy manual, you notice the Table of Contents still shows the old page numbers. What should you do?
Correct! The correct approach is to select inside the Table of Contents and press F9 (or select the "Update Table" button that appears above the TOC), then select "Update entire table." This tells Word to rebuild the TOC, picking up any new headings, changed headings, and updated page numbers. You should select "Update entire table" rather than "Update page numbers only" because you added new sections (new headings). There is no need to delete and recreate the TOC — the update function handles everything automatically.
Not quite. The correct approach is to select inside the TOC and press F9, then select "Update entire table." This rebuilds the TOC with all new headings and corrected page numbers. You never need to delete and recreate a TOC or manually edit page numbers — Word updates it automatically.
Lesson 2.3 Summary
Styles are predefined formatting sets that ensure consistency, enable automatic Tables of Contents, and support accessibility via screen reader navigation.
Themes control the overall visual design (colors, fonts, effects) of an entire document and update all styles simultaneously when changed.
Templates are reusable document blueprints combining styles, themes, layouts, and standard content — essential for standardized healthcare forms.
Building Blocks and Quick Parts let you save and insert reusable content (HIPAA disclaimers, address blocks, cover pages) in any document.
Word generates automatic Tables of Contents from heading styles — update with F9 after editing.
Document properties (metadata) support document management, version tracking, compliance, and privacy protection.